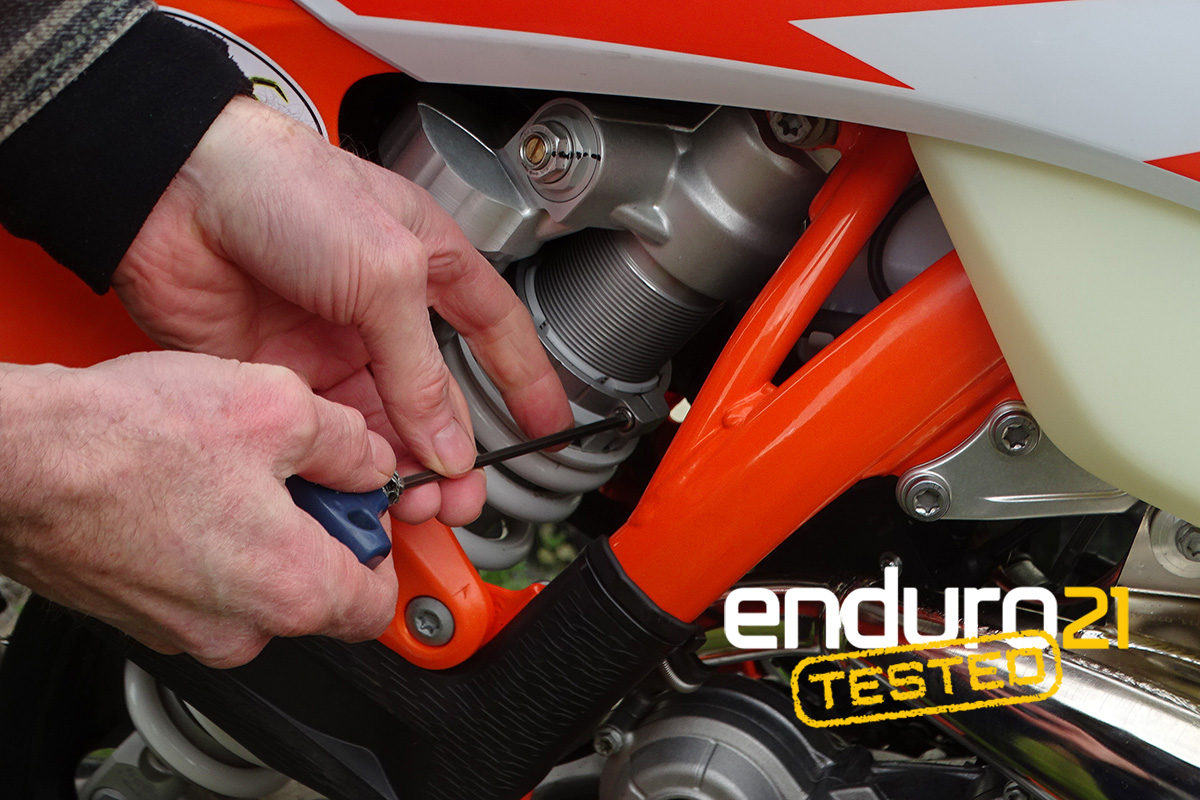

Hot tip: Repairing fork leg chips
Dirt and stones flicking up and taking chunks out of a fork leg is a problem when you ride off-road, a problem which can cause leaking fork seals. Does it mean an endless loop of fork seals replaced, new stanchions or an expensive repair is needed? Not necessarily…
The front end of our bikes are often the hardest hit when it comes to stones and dirt flying up from bikes in front and, believe it or not, from our own front wheel. Radiators, expansion pipes, headlights, and definitely our knuckles have all taken those roost hits from the rider in front.
The exposed down tubes on upside-down forks, the stanchions, are particularly vulnerable. By design, they should perfectly smooth so the fork seals can do their job. But look closely at your fork legs and are they perfectly smooth? Especially as we clock up the hours, the tiny nicks and marks start to appear, increasing the chances of fork oil leaking past.
Contrary to what you might think, that damage is most often being done to the inside of your fork leg stanchions by dirt and stones flying off your own spokes and tyre. It’s the area which is not protected by the fork guards and is particularly prone to those little nicks and scuffs on the surface which can lead to damaged or leaking fork seals.
Our local suspension specialist showed us a simple way to clean up those little marks and a solution that avoids bigger and more expensive fixes.
Check your fork stanchions
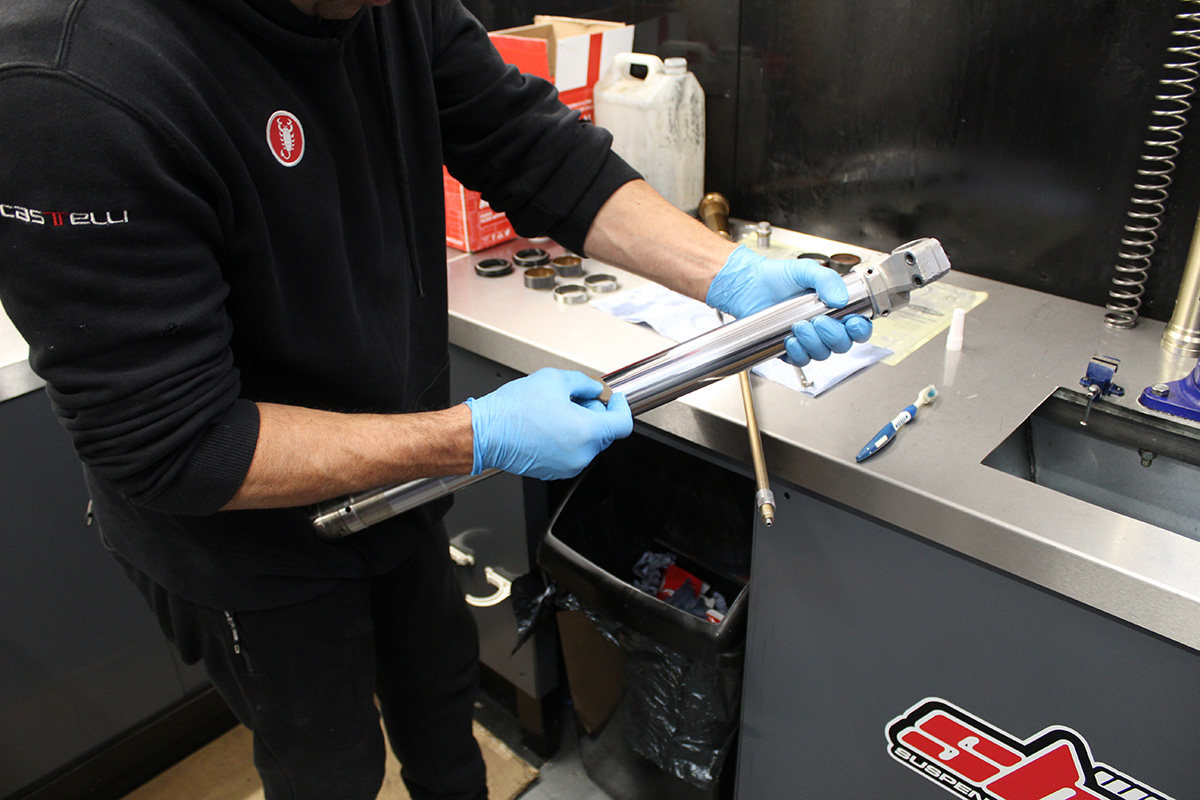
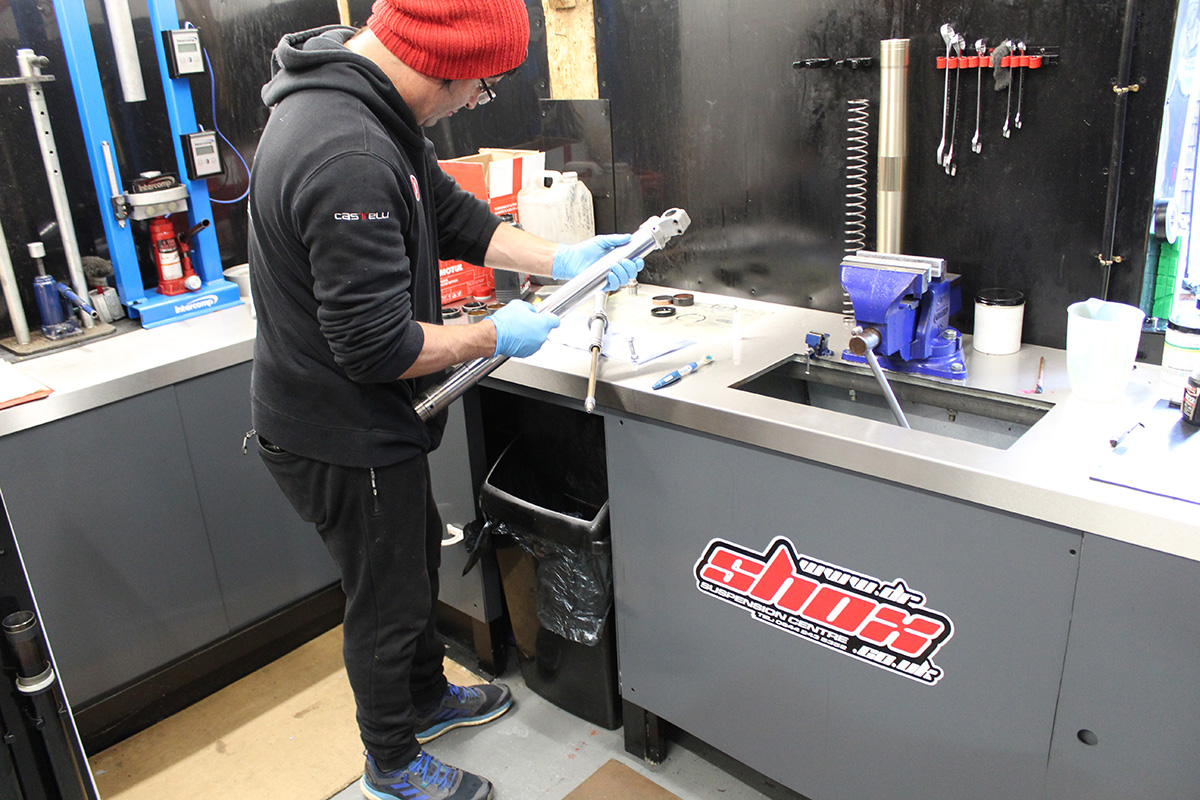
The first thing to do is check your own fork legs. After cleaning, remove the front wheel – take the fork leg out the triple clamps if you like – and check the exposed fork stanchion surface for damage by eye and by running your hand over the surface to feel for any small raised points or spikes.
Where tiny nicks (for want of a better word) sit higher on the fork leg surface and the stanchion is less than perfectly smooth, it gives the fork seal a harder time running up and down and sealing the oil inside. The more prominent that nick is, the more likely it is for the fork seal to allow oil through each time it races past that spot on the leg.
A gentle rub is all you need
What can you do about it? The technique is simple enough and was handed to us by an experienced suspension specialist. His solution is simple: a gentle rub with a small engineering stone, lightly across the surface of the fork leg.
The idea is to take away the tiny raised piece of metal standing taller on the surface and, crucially, do no more than just that. If you do too much you’ll risk creating a depression and more of a problem than you started with.
So do not rub hard or for too long – it just needs a gentle brush across the tiny raised surface area a couple of times with the stone before checking again with your hand to see if the ‘nick’ has been removed. Do not rub hard enough to take away the coating or create a depression or hole.
What is this magic stone?
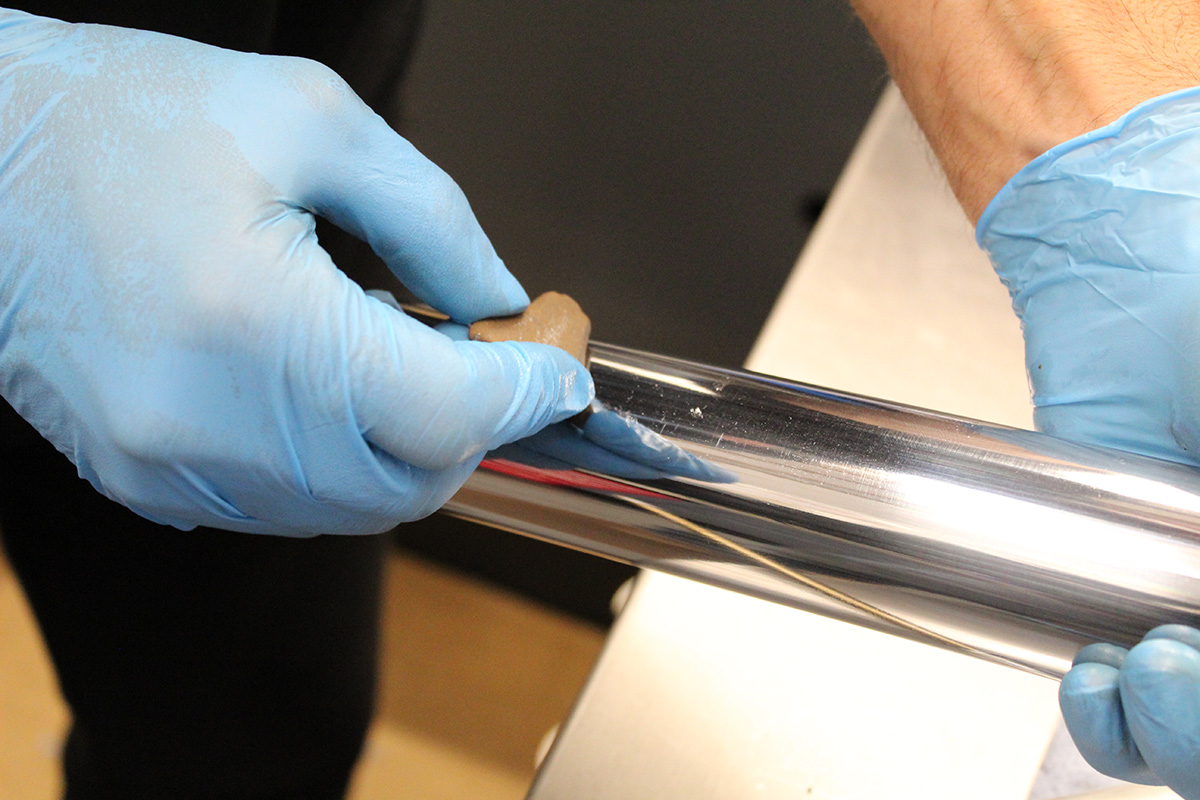
The stone can also be called sharpening stone, rubbing stone, scythe stone or polishing stone. They come in different grades so choose quite a light grade, not too gritty or harsh as to be too aggressive on the fork leg surface. Again, it is worth making the point the idea is to gently take the protrusion away and not to hack away at the actual fork leg surface.
We can all learn a bit from listening and watching experienced people who’ve raced and been service crew at the highest level in enduro. Golden nuggets learned from years and thousands of hours in the sport are the best ways to learn ourselves and this one felt like it was worth a share.
Enduro21 clocked this “top tip” while getting a set of forks serviced at Dr Shox Suspension Centre.
Photo Credit: Enduro21